In this tutorial originally created by AndHd2 and modified by TM-Tech1 for easy simple instructions on how to dual boot WP7 and GB Android 2.3.4 build using the one SD Card method. To use the Android dual boot super system set up, the Android build must be one that has been adapted to work via MAGLDR 1.12 . download the file., simple instructions are in the SDMAGLDR folder (Readme Text) in most Android MAGLDR dual boot builds.
This tutorial presumes you already know your way around MAGLDR and know what buttons to press to select etc. If you need any help then let me know. I will help the best I can, but I can't always promise to be online. The tutorial recommends you use a SD Card reader instead of Mass Storage in MAGLDR as Mass Storage is not always reliable.
Lets start and follow the step carefully :
1.Download a WP7 ROM like this one by XBMOD
(Chevron Unlocked Already, you will need a Live ID to acces the market, *GET A WORKING HD2 WP7 WINDOWS LIVE ID (MARKET ACCESS), If you needed download the file. and a Android Build (MAGLDR BUILD Like This GB 2.3.4 Android Build download here
*NOTE:
Don't forget to follow the simple easy instructions in the SDMAGLDR folder and If you desire to make the icons larger, copy the root folder in the Buildprop folder to the Android folder.
2.Run DWI.exe to install WP7 to your phone.
*NOTE:
WP7 ROM must be installed on your HD2 FIRST before installing the Android ROM build to your SD Card (MAGLDR BUILD)
3.Go through the setup and once it tells you that you have a new SMS which is welcoming you to WP7 go to> Settings >About> Reset Your Phone and once phone restarts hold power to enter into MAGLDR mode.
*NOTE:
the phone must be Restarted from a Hard Reset
4.Remove your SD Card and insert it into the computer via a micro SD Card reader adapter.
5.Used Minitools Partition Wizard which you can get HERE , the Home version is free. Start the program and you will see two partitions on your SD Card on some Windows 7 computers like this
*For Example: Other 200 MB and Other 14.77 GB then right click and delete the larger 14.77 GB partition, click on Apply, ok (This is the Example Only),
this will leave you with a Unallocated partition.
6.Now right click on the "Unallocated partition" and select (Create). Leave "Create As" as (Logical) and "File System" as (Unformatted).
Under "Size and Location", slide your Unallocated space to the right to roughly half the size of your SD card so the blank grey area is on the left. Click OK.
For Example: The top numbers should be lower around 7022 and the lower numbers should be always be higher around 7900. This should be half way of the SD Card
7. Now click on Apply (The tick) and when it comes up saying Successful (This may take a while be patient), remove your SD Card and put it back into your phone and shut down Partition Manager.
*NOTE:
APPLY is located in the upper left corner of the MiniTools Partition Wizard Module
8.Boot up WP7 and go through the setup again. Once the message beeps again to say welcome to WP7, go to Settings> About and look at the "Total Storage" and "Available Storage". These values should now be roughly the same.
For Example: (7.78GB/7.37GB)
9.Hold Power button to restart and hold Power to enter into MAGLDR mode. Remove SD Card and put it back in your card reader. Open Partition Wizard again, right click on the "Other 200 MB" partition and select (Delete). Right click on the new "Unallocated partition" and select (Create). The "File System" should be (Fat32) and set (as Primary). Click Ok and Apply (The tick be patient).
*NOTE:
APPLY is located in the upper left corner of the MiniTools Partition Wizard module
10.When all the changes have been applied click OK and right click on the Other partition and select (Modify) and then Set Partition (As Primary).
This is important to run Android as well as WP7. If Partition were still Logical then once Android Build was loaded it would not recognise anything off your memory card . Put the SD Card back into your phone and boot WP7 and exit Partition Manager.
11.In WP7, go to Settings> About and double check the Total Storage and Available Storage to see if they are the same as before, they should be except one should now be larger than the other one.
For Example: (7.76 GB/7.56 GB)
12.Power off and insert SD Card back into your card reader.
13.This time on your computer go to Start> My Computer depending what version of Windows you are running, you will see your SD Card on the Drive, copy/move your GB Android 2.3.4 build MAGLDR ready folder to your SD Card, open your SD Card on the Drive and paste your GB 2.3.4 Android build there.
*NOTE:
you may have left your GB Android 2.3.4 build in My Documents on your computer, just copy it to your SD Card
14.Once your GB Android 2.3.4 folder has been copied to your SD Card, remove the SD Card and put it back into your phone. Go back into the MAGLDR mode, press the volume buttons up and down until you get to Services > BootSettings > AD SD Dir.> Android> Boot AD SD>, push in the phone's green key to boot up in the Android mode.
*NOTE: The next time and there after you want to boot up into the Android mode, (GET INTO THE MAGLDR MODE) just highlight # 2> Boot AD SD> push the phone's green answer key, your HD2/WP7/Android dual booting mobile device will now boot up in the Android mode
15.Be patient it may take 2 to 5 minutes for the boot up to start......
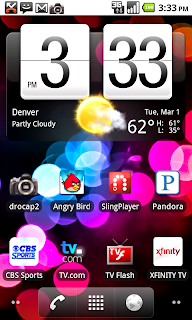
Congratulations.......you now have WP7 and Android dual booting on your device.
For installation tutorial HTC HD2 WP7 and Android gingerbread 2.3.4 dual boot are made by 96edwy of XDA Developers, please use the "MiniTools Partition Wizard" found below, because it's much more easier for beginners, they both looks the same.
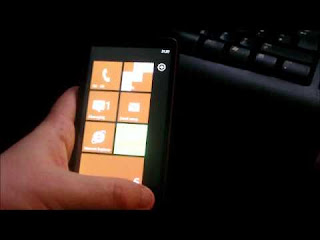
To make easier during setup,please look the video for part1 and part2.
Sponsored
This tutorial presumes you already know your way around MAGLDR and know what buttons to press to select etc. If you need any help then let me know. I will help the best I can, but I can't always promise to be online. The tutorial recommends you use a SD Card reader instead of Mass Storage in MAGLDR as Mass Storage is not always reliable.


Lets start and follow the step carefully :
1.Download a WP7 ROM like this one by XBMOD
(Chevron Unlocked Already, you will need a Live ID to acces the market, *GET A WORKING HD2 WP7 WINDOWS LIVE ID (MARKET ACCESS), If you needed download the file. and a Android Build (MAGLDR BUILD Like This GB 2.3.4 Android Build download here
*NOTE:
Don't forget to follow the simple easy instructions in the SDMAGLDR folder and If you desire to make the icons larger, copy the root folder in the Buildprop folder to the Android folder.
2.Run DWI.exe to install WP7 to your phone.
*NOTE:
WP7 ROM must be installed on your HD2 FIRST before installing the Android ROM build to your SD Card (MAGLDR BUILD)
3.Go through the setup and once it tells you that you have a new SMS which is welcoming you to WP7 go to> Settings >About> Reset Your Phone and once phone restarts hold power to enter into MAGLDR mode.
*NOTE:
the phone must be Restarted from a Hard Reset
4.Remove your SD Card and insert it into the computer via a micro SD Card reader adapter.
5.Used Minitools Partition Wizard which you can get HERE , the Home version is free. Start the program and you will see two partitions on your SD Card on some Windows 7 computers like this
*For Example: Other 200 MB and Other 14.77 GB then right click and delete the larger 14.77 GB partition, click on Apply, ok (This is the Example Only),
this will leave you with a Unallocated partition.
6.Now right click on the "Unallocated partition" and select (Create). Leave "Create As" as (Logical) and "File System" as (Unformatted).
Under "Size and Location", slide your Unallocated space to the right to roughly half the size of your SD card so the blank grey area is on the left. Click OK.
For Example: The top numbers should be lower around 7022 and the lower numbers should be always be higher around 7900. This should be half way of the SD Card
7. Now click on Apply (The tick) and when it comes up saying Successful (This may take a while be patient), remove your SD Card and put it back into your phone and shut down Partition Manager.
*NOTE:
APPLY is located in the upper left corner of the MiniTools Partition Wizard Module
8.Boot up WP7 and go through the setup again. Once the message beeps again to say welcome to WP7, go to Settings> About and look at the "Total Storage" and "Available Storage". These values should now be roughly the same.
For Example: (7.78GB/7.37GB)
9.Hold Power button to restart and hold Power to enter into MAGLDR mode. Remove SD Card and put it back in your card reader. Open Partition Wizard again, right click on the "Other 200 MB" partition and select (Delete). Right click on the new "Unallocated partition" and select (Create). The "File System" should be (Fat32) and set (as Primary). Click Ok and Apply (The tick be patient).
*NOTE:
APPLY is located in the upper left corner of the MiniTools Partition Wizard module
10.When all the changes have been applied click OK and right click on the Other partition and select (Modify) and then Set Partition (As Primary).
This is important to run Android as well as WP7. If Partition were still Logical then once Android Build was loaded it would not recognise anything off your memory card . Put the SD Card back into your phone and boot WP7 and exit Partition Manager.
11.In WP7, go to Settings> About and double check the Total Storage and Available Storage to see if they are the same as before, they should be except one should now be larger than the other one.
For Example: (7.76 GB/7.56 GB)
12.Power off and insert SD Card back into your card reader.
13.This time on your computer go to Start> My Computer depending what version of Windows you are running, you will see your SD Card on the Drive, copy/move your GB Android 2.3.4 build MAGLDR ready folder to your SD Card, open your SD Card on the Drive and paste your GB 2.3.4 Android build there.
*NOTE:
you may have left your GB Android 2.3.4 build in My Documents on your computer, just copy it to your SD Card
14.Once your GB Android 2.3.4 folder has been copied to your SD Card, remove the SD Card and put it back into your phone. Go back into the MAGLDR mode, press the volume buttons up and down until you get to Services > BootSettings > AD SD Dir.> Android> Boot AD SD>, push in the phone's green key to boot up in the Android mode.
*NOTE: The next time and there after you want to boot up into the Android mode, (GET INTO THE MAGLDR MODE) just highlight # 2> Boot AD SD> push the phone's green answer key, your HD2/WP7/Android dual booting mobile device will now boot up in the Android mode
15.Be patient it may take 2 to 5 minutes for the boot up to start......
Congratulations.......you now have WP7 and Android dual booting on your device.
For installation tutorial HTC HD2 WP7 and Android gingerbread 2.3.4 dual boot are made by 96edwy of XDA Developers, please use the "MiniTools Partition Wizard" found below, because it's much more easier for beginners, they both looks the same.
To make easier during setup,please look the video for part1 and part2.